How to Install a Pool Filter?
- Share
- Issue Time
- Aug 31,2022
Summary
Pool pumps help keep the water clean, clear, and ready for summer fun. Learn about the different types of filters and see examples of how to install a sand pool filter for an above-ground pool.
In addition to maintaining the correct water chemistry, pool pumps and filters help keep the water clean, clear, and ready for summer fun. Learn about the different types of filters and see examples of how to install a sand pool filter for an above-ground pool.
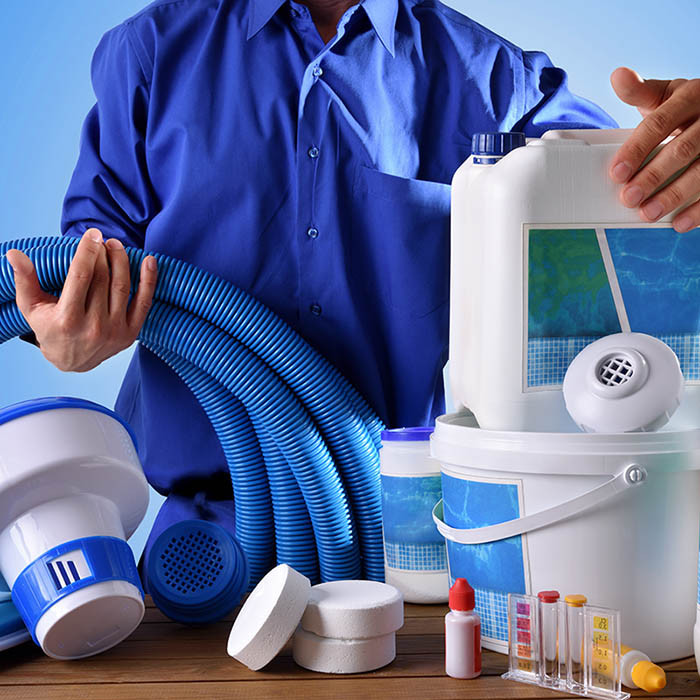
Types of pool filters
The basic operation of different types of pool filtration systems is similar. Pool filter pumps draw water from the pool and push it through filter media or material to remove debris and other particles. The filtered water is then returned to the pool. Depending on the type of pool filter, debris can be flushed out of the system or out of the filter. There are three types of swimming pool filters: sand filters, cartridge filters, and diatomaceous earth (DE) filters.
Select pool filter location
Carefully plan the location of your pool filtration system - once set up, it can be difficult to move. Start by checking local regulations and homeowners association regulations that may apply. Here are some additional factors to keep in mind:
The system requires a level, rigid surface
Local codes may dictate electrical requirements, but generally, you will need to use an outdoor grounded electrical outlet with a ground fault circuit interrupter (GFCI). The container should be at least 6 feet from the pool and within the reach of the pump line. Do not use extension cords.
Follow any codes governing the placement of the pump relative to the pool.
The location should allow you easy access to filter system maintenance.
The pump needs good air circulation to help keep the motor cool and needs to be protected from excessive moisture and flooding.
A straight pipe or pipe directly from the filtration system to the swimming pool works best.
For sand and DE filters, consider where wastewater can be pumped when backwashing the system. Local regulations may prohibit wastewater from entering storm drains.
Your manual may have specifications on the height of the pump position relative to the pool water to allow the pump to start.
Install pool filters
The installation steps vary depending on the type of filter you want to install. We provide general steps for installing sand filters for above-ground pools, but always follow the instructions for specific filters, pumps, and pools.
Step 1: Unpack and inspect parts
Unpack and familiarize yourself with pump system components. You may want to lay out all the pieces on the tarp to make sure they are always available when you need them. Check the manual - there may be some parts that were partially assembled for packaging but will need to be reassembled to fit properly.
Step 2: Connect drain and pre-filter assembly
Secure the drain assembly to the bottom of the filter box (if applicable). Make sure to place the gasket correctly. There may be one for the inside of the tank and one for the outside of the tank. If your system includes a pre-filter or leaf filter, connect it to the pump as directed.
Step 3: Securing the system to the base plate
Make sure the ports on the pump are oriented correctly and use the included hardware to attach the pump to the baseplate (if applicable). Attach the filter box to the pump system base, making sure it is properly positioned on the base relative to the pump and sump.
Step 4: Set up the pump
If your system includes fittings or adapters for pump ports, wrap the threads of the fittings with the plumber's tape and connect them to the correct ports. Connect the supplied hose. You might use a screwdriver or screwdriver and wrench to secure the hose clamp. Or there may be hose nuts that allow you to hand tighten the hose to the fitting.
If you're using PVC (polyvinyl chloride) pipe instead of a hose, use a hacksaw to cut the pipe to length, then use primer and PVC adhesive to assemble. It's a good idea to cut the pipes out of the tarp so you can collect and dispose of the shavings.
Step 5: Set up the canister
Place the riser into the filter canister as instructed. You may need to connect a branch pipe to the bottom of the riser in the tank, or the branch pipe may already be connected. If your filtration system includes a temporary cover to keep sand out of the riser, place it on top of the riser. Otherwise, secure the plastic bag to the top of the riser with a rubber band or cover it with tape.
Step 6: Add filter sand and water
Make sure the riser is in the correct position - you won't be able to adjust it after adding filter sand. Your system may include an exhaust pipe that you will need to carefully secure above the sand when adding. Note the minimum and maximum levels of system sand and add sand to the correct level according to the filter instructions. Don't overfill. Too much sand can damage the system. After adding the correct amount of sand, remove the lid, bag, or tape from the riser to make sure the sand is evenly distributed in the tank. Clean the lip on top of the filter canister. Use a garden hose to add water to the canister until the water level is just below the riser opening.
Note: Depending on your filter, the instructions may tell you to add only a portion of the sand, spread it out evenly, then add some water before adding the rest of the sand to the recommended level. Follow the instructions for your system. Make sure the riser opening is plugged in before adding sand.
Step 7: Install the filter valve
Apply o-ring lubricant to the filter valve o-ring and install it on the valve, making sure to sit in place for a good seal. Check that the ports on the valve (for example, return, pump, and waste) are oriented correctly, and slide the valve to the top of the riser. Don't pull up on the riser - you could damage it and get sand into the pool.
Secure the valve to the canister using the included clips according to the manufacturer's instructions. If the gauge is not pre-installed, apply the plumber's tape to the threads on the device and install it on the valve. If your system includes O-rings, gaskets, or adapter fittings for valves, install them as directed, taking care not to overtighten them. You may need to apply the plumber's tape to the threads of the fitting.
Step 8: Install the remaining hose or tubing
From the pump discharge port to the pump port on the valve
From the return port on the valve to the inlet fitting on the pool
Make sure the hoses or pipes in the system are supported to reduce pressure at the connections.
If your filtration system uses PVC tubing, you may also need to connect the PVC tubing to the waste port fitting on the valve. If you're installing a sand filter or DE filter, you'll also need to purchase a backflush hose to connect as needed for pool maintenance.
Some pumps have different discharge ports for different types of filters (sand, DE, or cartridge). Check your manual to determine which port is right for your filter type. Install the provided cover on the other port.
It would be nice to have a way to close the line between the pool and the filter system so you can disconnect the hose or pipe for maintenance. If you are installing PVC piping, also consider adding fittings to the pump suction line, pump discharge line, and return line to the return pool so that you can easily disconnect the pump and valve from the piping. Add short pipe segments to adapter fittings to connect fittings.
The above describes the installation steps of the swimming pool filter in detail. If you still have questions or plan to buy a new swimming pool filter, please contact us.
MAYGO is a professional custom pool filter manufacturer. MAYGO POOL focuses on providing professional technical solutions for residential and commercial swimming pools. At present, we have provided swimming pool solutions to thousands of customers in North America, South America, Europe, Australia, etc. We have a team of engineers and mold making with extensive experience in electro-mechanical and CFD hydraulic design. They are fully committed to research and development. MAYGO has obtained a number of patents, as well as CE, SAA, ETL, CCC, CANS certification.